
How to connect a Summing Mixer
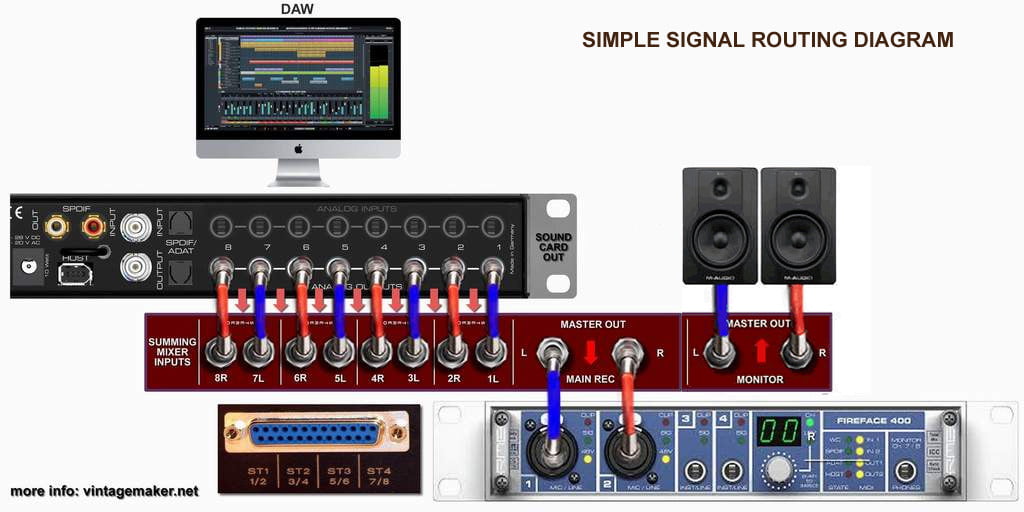
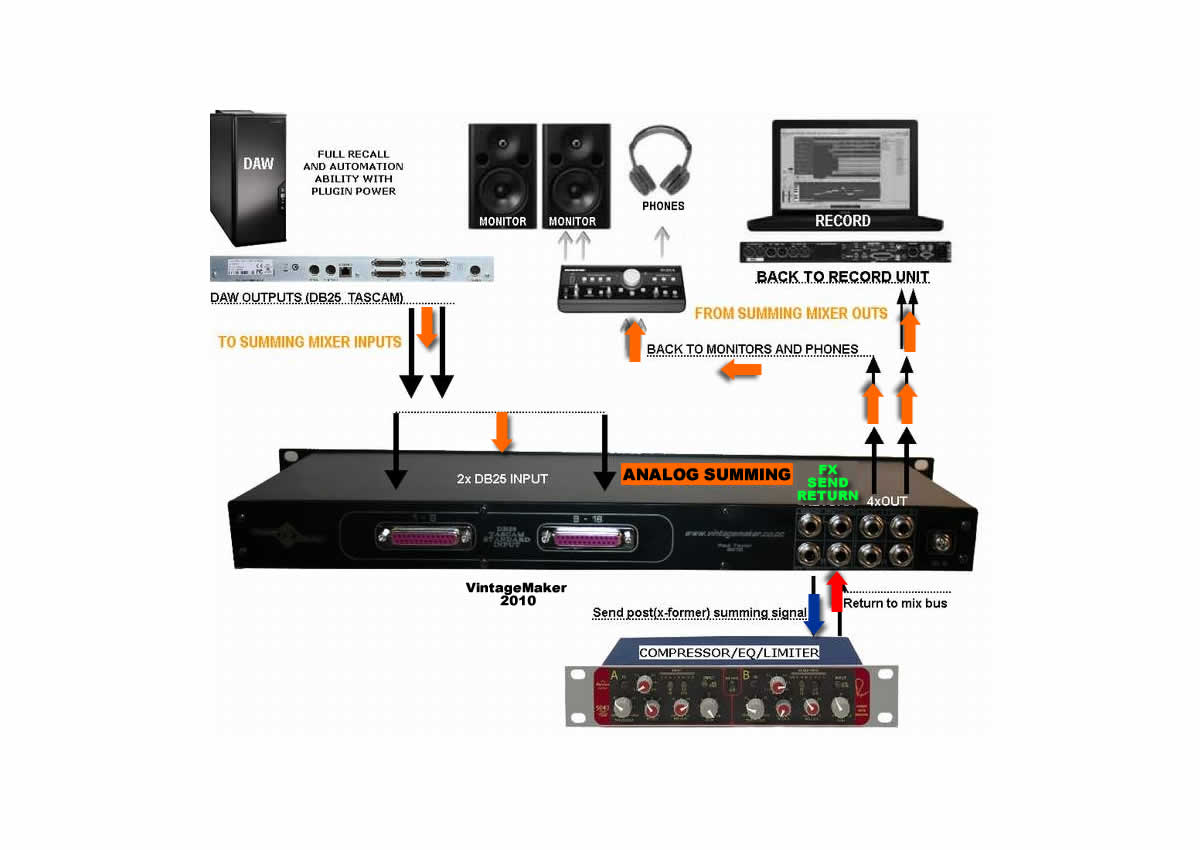
Signal flow in order: DAW OUT – SUMMING – DAW REC
1. DAW Output – Digital-to-Analog (DA) Converter Out
2. Summing Mixer Inputs
4. Summing Mixer Outputs
3. DAW Recording – Analog-to-Digital (AD) Converter Inputs
Does analog summing make a difference? Is there any real value in summing mixers – Is it necessary to have a summing mixer? How important is analog summing? Here is the answer: read more…
2 x STEREO SUMMING: Here is a Basic simple setup (example) for 4 channel summing mixer analog stereo mixing
You can get nice and great balance between low/highs, and you have safe zone by the Analog Headroom for fundamental harmonics for your transients generated on the summing inputs.
1/2: Bass/Drums -Low-mid Instruments
3/4: Vocals Guitars Keys/Effects – Mid – High instruments.
4 x STEREO SUMMING: Example for 8 channel summing mixer with STEREO stems
1/2: Bass/Drums
3/4: Vocals
5/6: Guitars
7/8: Keys/Effects
SUBGROUP SUMMING: You can also use Subgroups if you want to mix multiple channels, for example.
What’s the Purpose of Subgroups? In a big pop production with 100 tracks that include drums, keyboards, guitars, vocals, and effects, you might need several subgroup buses for some processing before they all come together into the stereo mix. Read More about subgroups….
1/2: Bass/or/Drum Group
3/4: Vocal Group
5/6: Guitars Group
7/8: Keys/Effects / Other Group
Let’s say all drum tracks are routed to the drum subgroup, and all the background vocals are sent to the backup vocal subgroup. When subgroups are configured correctly, we can efficiently blend various groups of instruments, allowing us to process and mix the audio collectively in groups rather than on individual tracks.
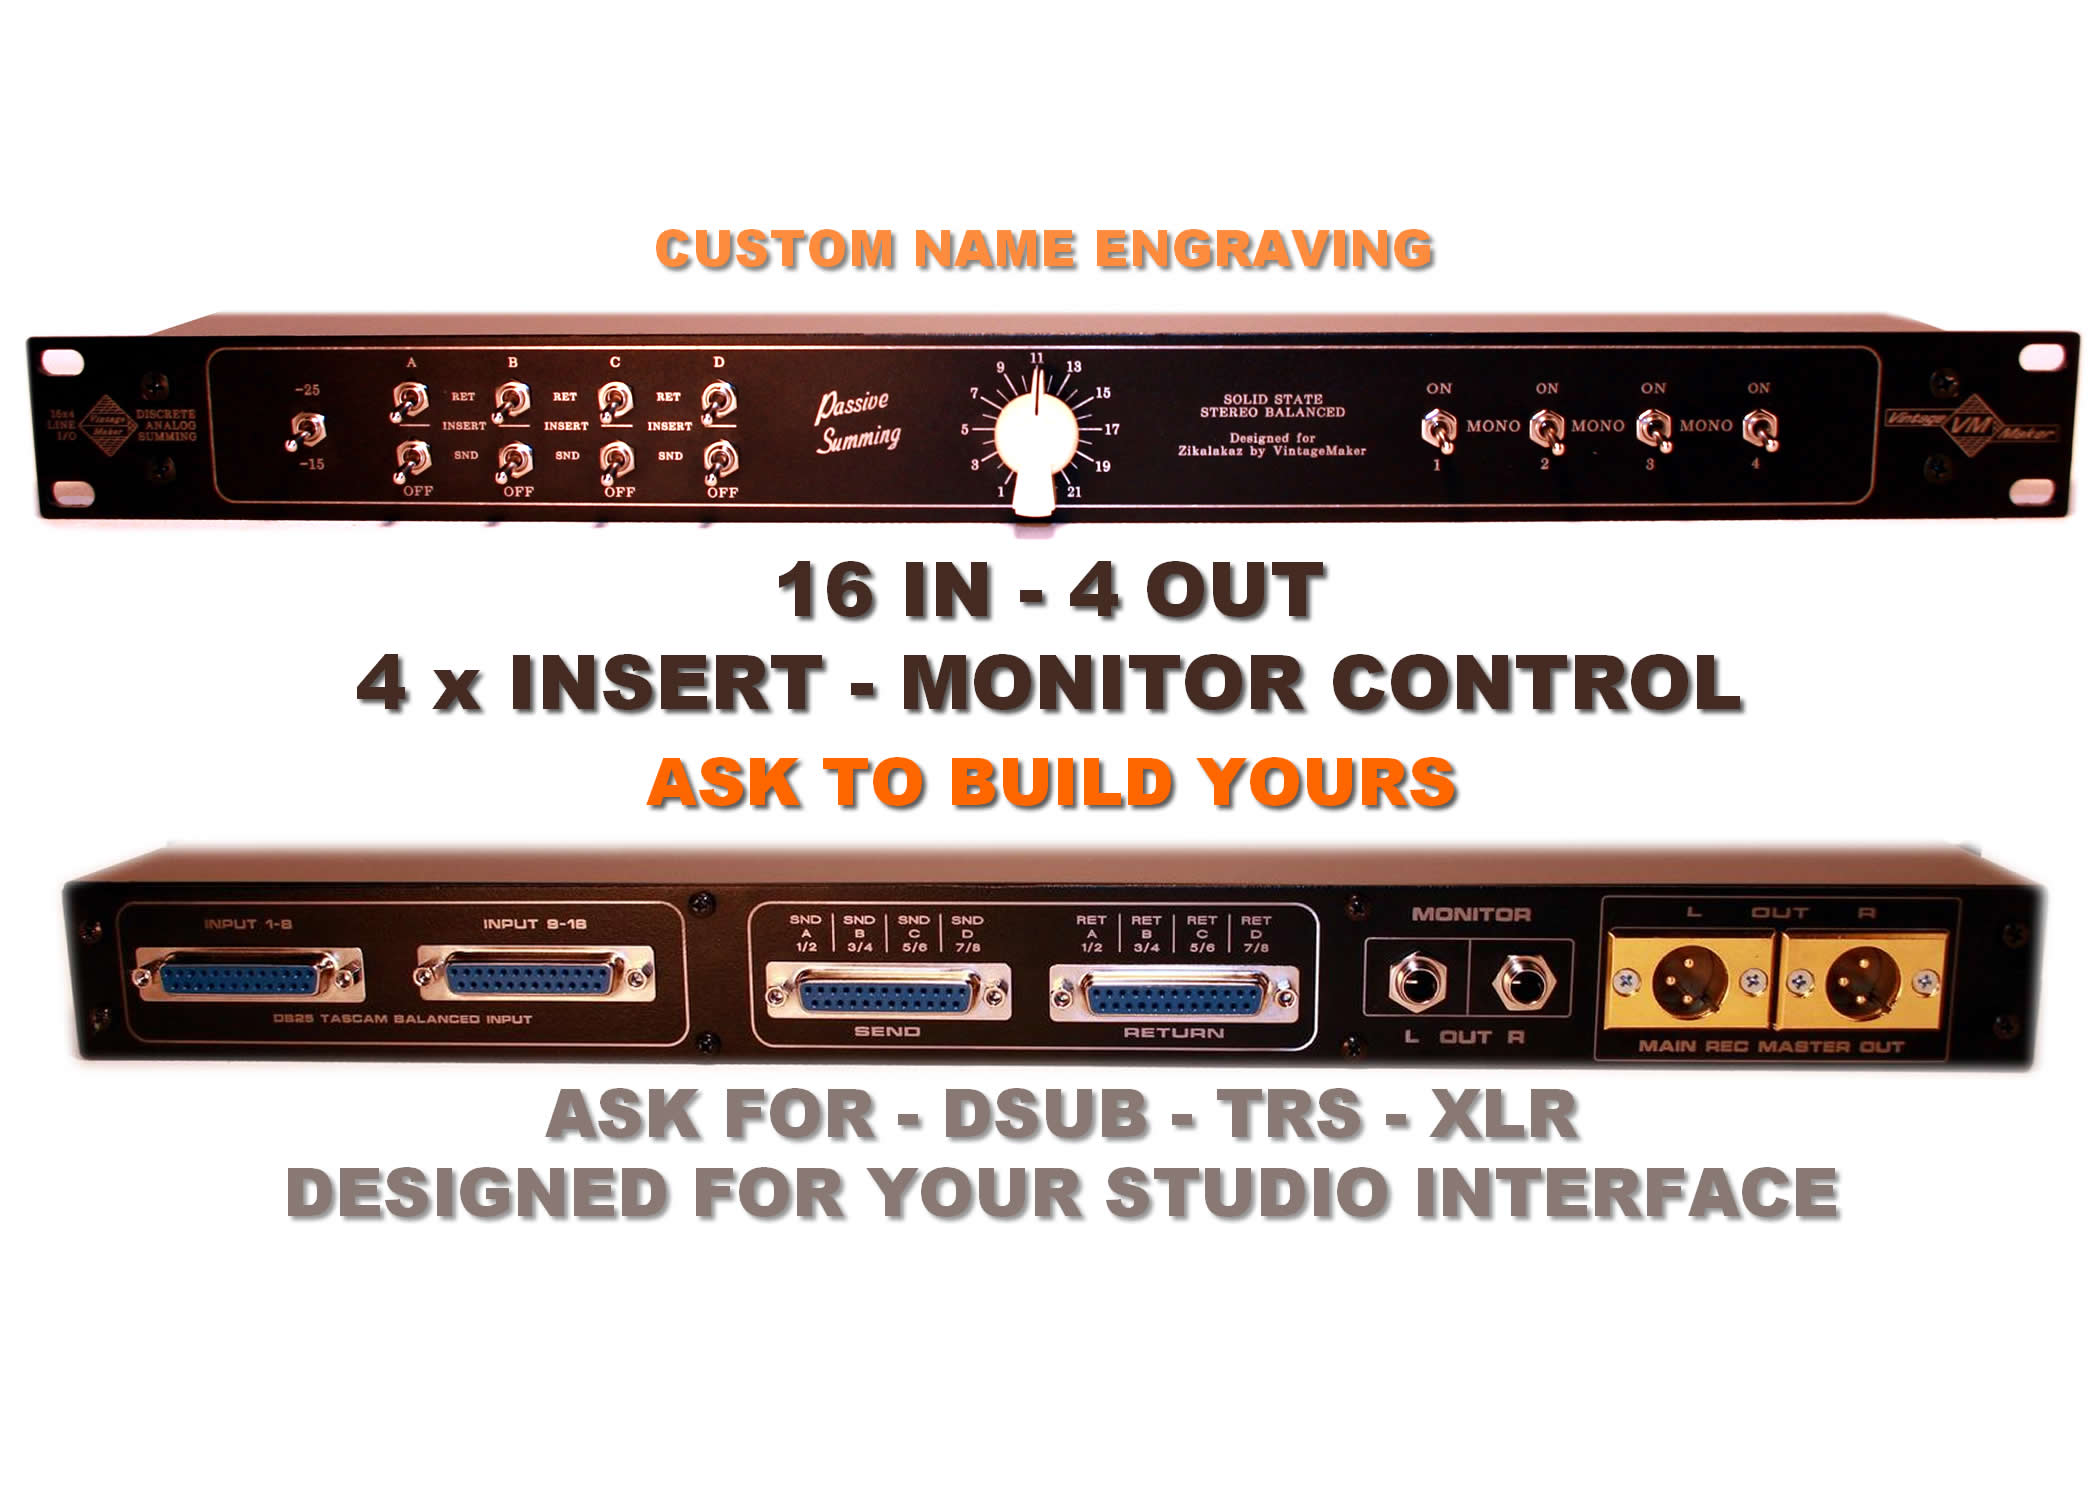
8 x STEREO SUMMING: 16 channel input Analog Summing Mixer STEREO session routing from DAW interface setup
All channel pairs [1/2 through 15/16] are by default are panned hard left/right. (stereo) This configuration is the only sensible way in which each signal contributing to the stereo track from DAW. You have full control on panorama and other automation from the DAW (Cubase, Protools, Reaper, Studio One and so on) By utilizing automation, clip gain adjustments, various plug-ins, and editing functions, along with the incorporation of analog warmth through a summing mixer, it ensures complete project repeatability from the DAW
1 & 2. Stereo Kick Drum
3 & 4. Stereo Bass Guitar
5 & 6. Stereo Snare Drum
7 & 8. Stereo Backing Vocals
9 & 10. Stereo Overhead Mics
11 & 12. Stereo Bass Guitar
13 & 14. Stereo Electric Guitar
15 & 16. Stereo Keyboards and Synths and Effects
Please note: the more analog D/A channels the more analog benefits wide 3D panorama sound
Now lets move forvard for a real analog feature called – Analog Mono
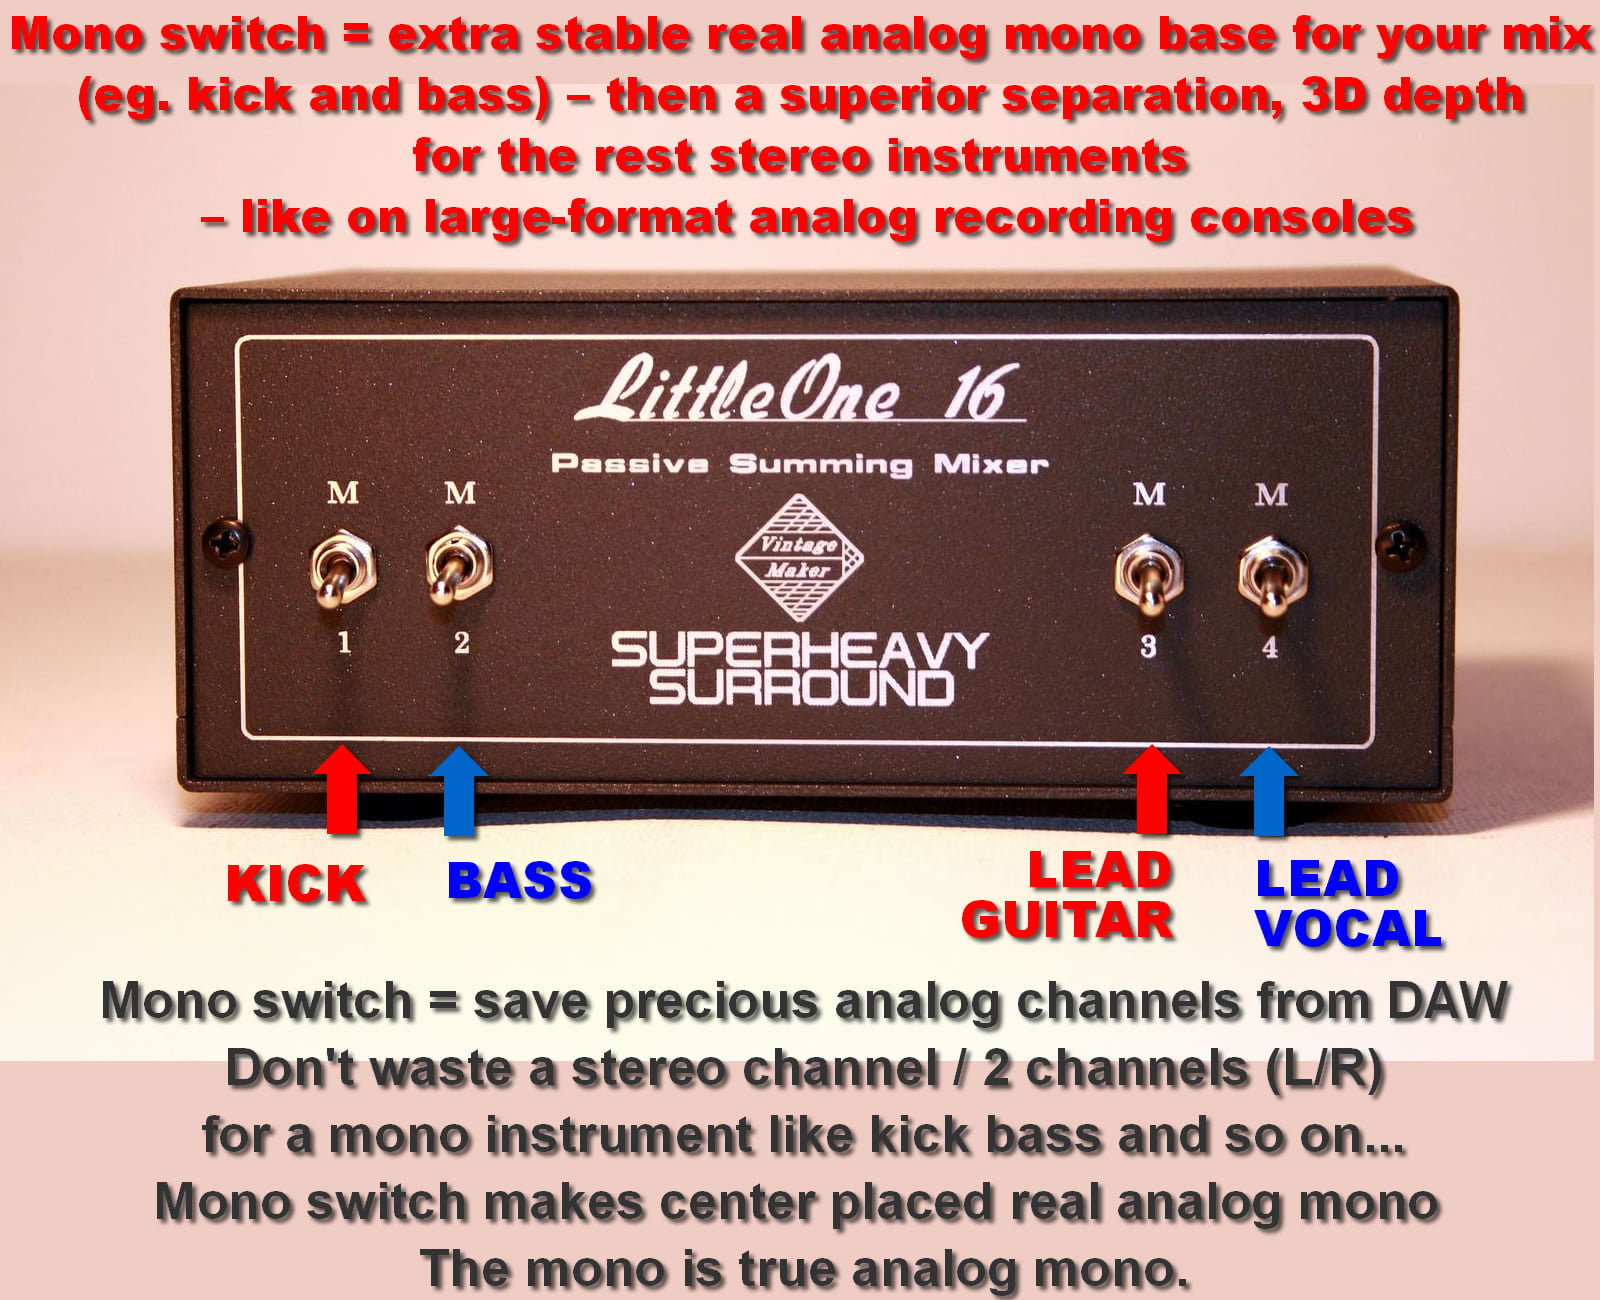
Mono Input Conversion” switch provides an extra stable, Real analog mono Base for your mix (e.g., kick and bass) and, as a result, delivers superior separation and 3D depth for stereo instruments, just like what you find on large-format analog recording consoles. When using mono sounds like kick drums, snares, main vocals, or bass that need to be in the center of the mix, it’s not efficient to use stereo left/right channels, which would need two converters for a mono outcome.
2 x MONO + 1 x STEREO SUMMING: 4 channel audio routing example on Summing Mixer with 1x Stereo to 2 Mono input conversion switch
In 1: Mono Kick > mono
In 2: Mono Bass > mono
In 3/4: Rest Stereo Instruments: Synths\Effects\Pads\Guitars\Vocals etc > stereo
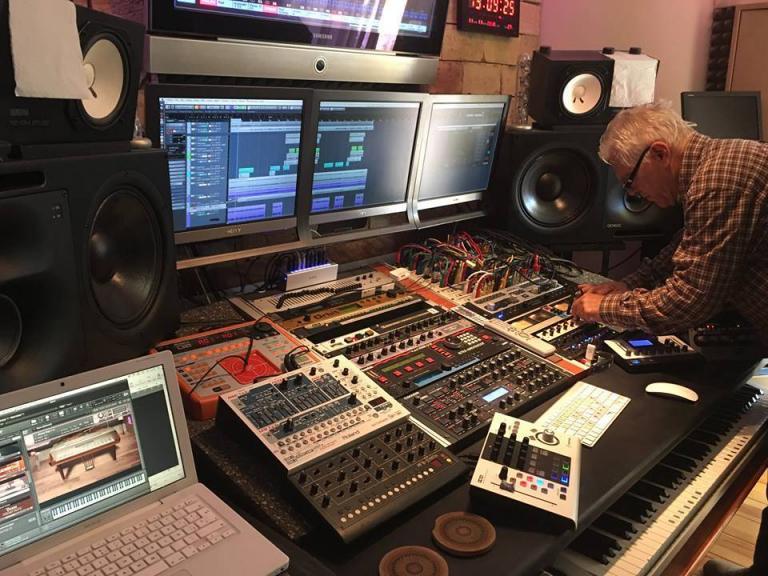
A hybrid mixing setup offers the advantages of both Digital & analog worlds.
It allows you to harness the precision of digital tools such as automation, plug-ins, and editing, all while infusing your mix with the warmth and individual character of analog equipment. It’s akin to combining the strengths of both in-the-box and out-of-the-box environments to shape the ideal sound.
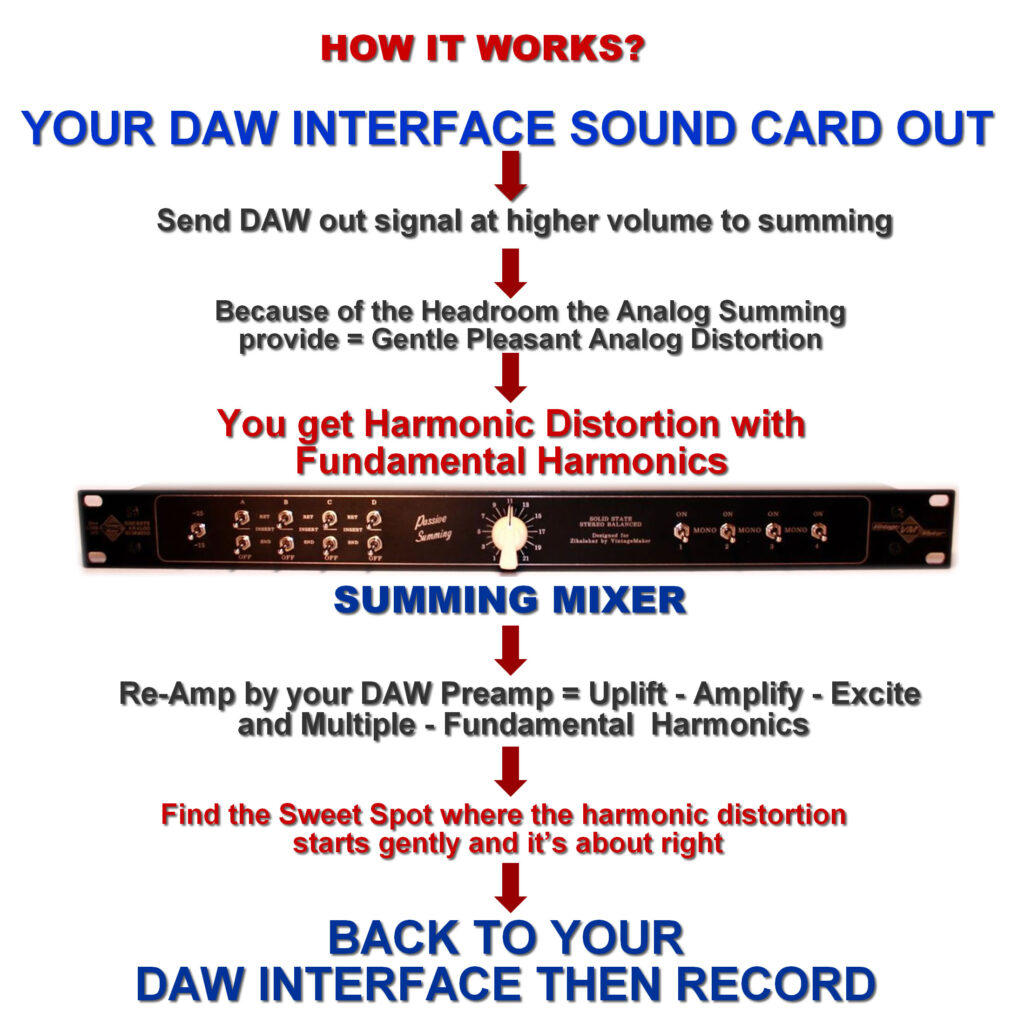
Here are the general steps:
1. Connect your audio sources, such as microphones or line-level devices, to the input channels of the summing mixer.
2. Connect the output channels of the summing mixer to the inputs of your audio interface or recording device.
3. Set the levels of each input channel on the summing mixer to ensure that the signals are not clipping.
4. Adjust the levels of the output channels on the summing mixer to achieve the desired balance and overall level of the mix.
When connecting your summing mixer, it’s important to make sure that your equipment is compatible and that you have the necessary cables and adapters. Additionally, the VintageMaker electronic circuit design is optimized to provide sufficient headroom to accommodate the signals from a large number of channels, while maintaining a low noise floor. This ensures that your recordings are clean, clear, and free of unwanted noise or distortion.

