Mono Channel Conversion Switch: How It Works and Why It Matters
The Mono Channel Conversion Switch Gives You True Analog Mono/Stereo Control — Just Like on Large Analog Mixing Consoles
Most analog summing mixers expect stereo inputs: a Left and a Right signal for each stereo channel pair. But when you want to place a mono source – like a kick drum or bass – perfectly centered, you’d normally waste two interface outputs just to send the same mono signal to both sides.
The Mono Channel Conversion Switch solves this. It lets you route mono sources directly in hardware – centered, or placed anywhere in the stereo field. This guide explains how the switch works, which version suits your setup, and when to use it.
New to analog summing? Start here: How Analog Summing Creates Depth, Warmth & Headroom →
Three Switch Versions: STM, Per-Channel, and LCR
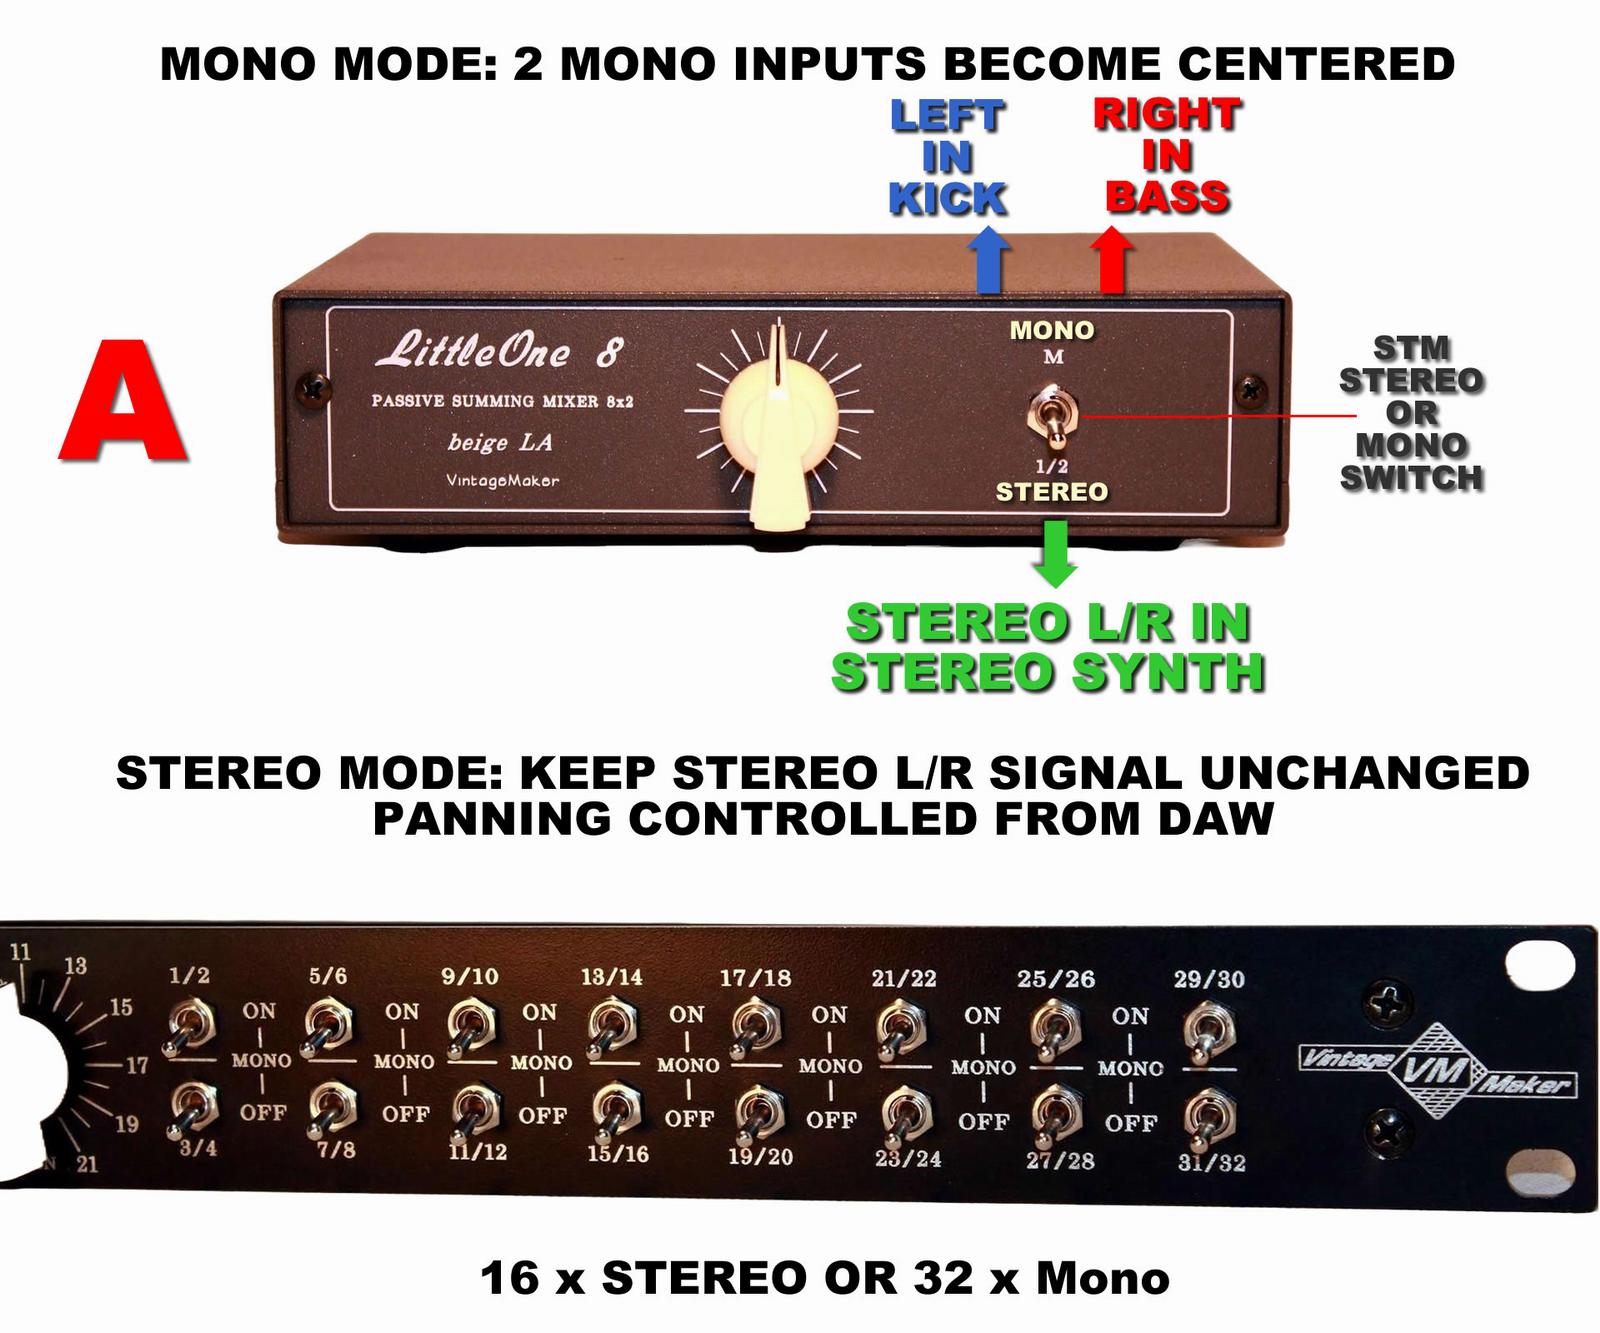
🔵 STM (Stereo-to-Mono)
Type: One switch per Stereo pair
Use only for: Two mono sources patched as a stereo pair (e.g. Kick + Bass)
Result: Kick and bass become centered (equal on L/R outputs).
Switch: UP = Mono • DOWN = Stereo
Do NOT activate for normal stereo L/R signals — it will collapse your stereo image.
🟢 Per-Channel Mono
Type: One switch per mono channel
Use for: Individual mono sources
Result: Center this channel while keeping all other channels in their original position.
Switch: UP = Center this input • DOWN = Keep original position
Ideal when some instruments need centering and others need Hard-Left or Hard-Right panning.
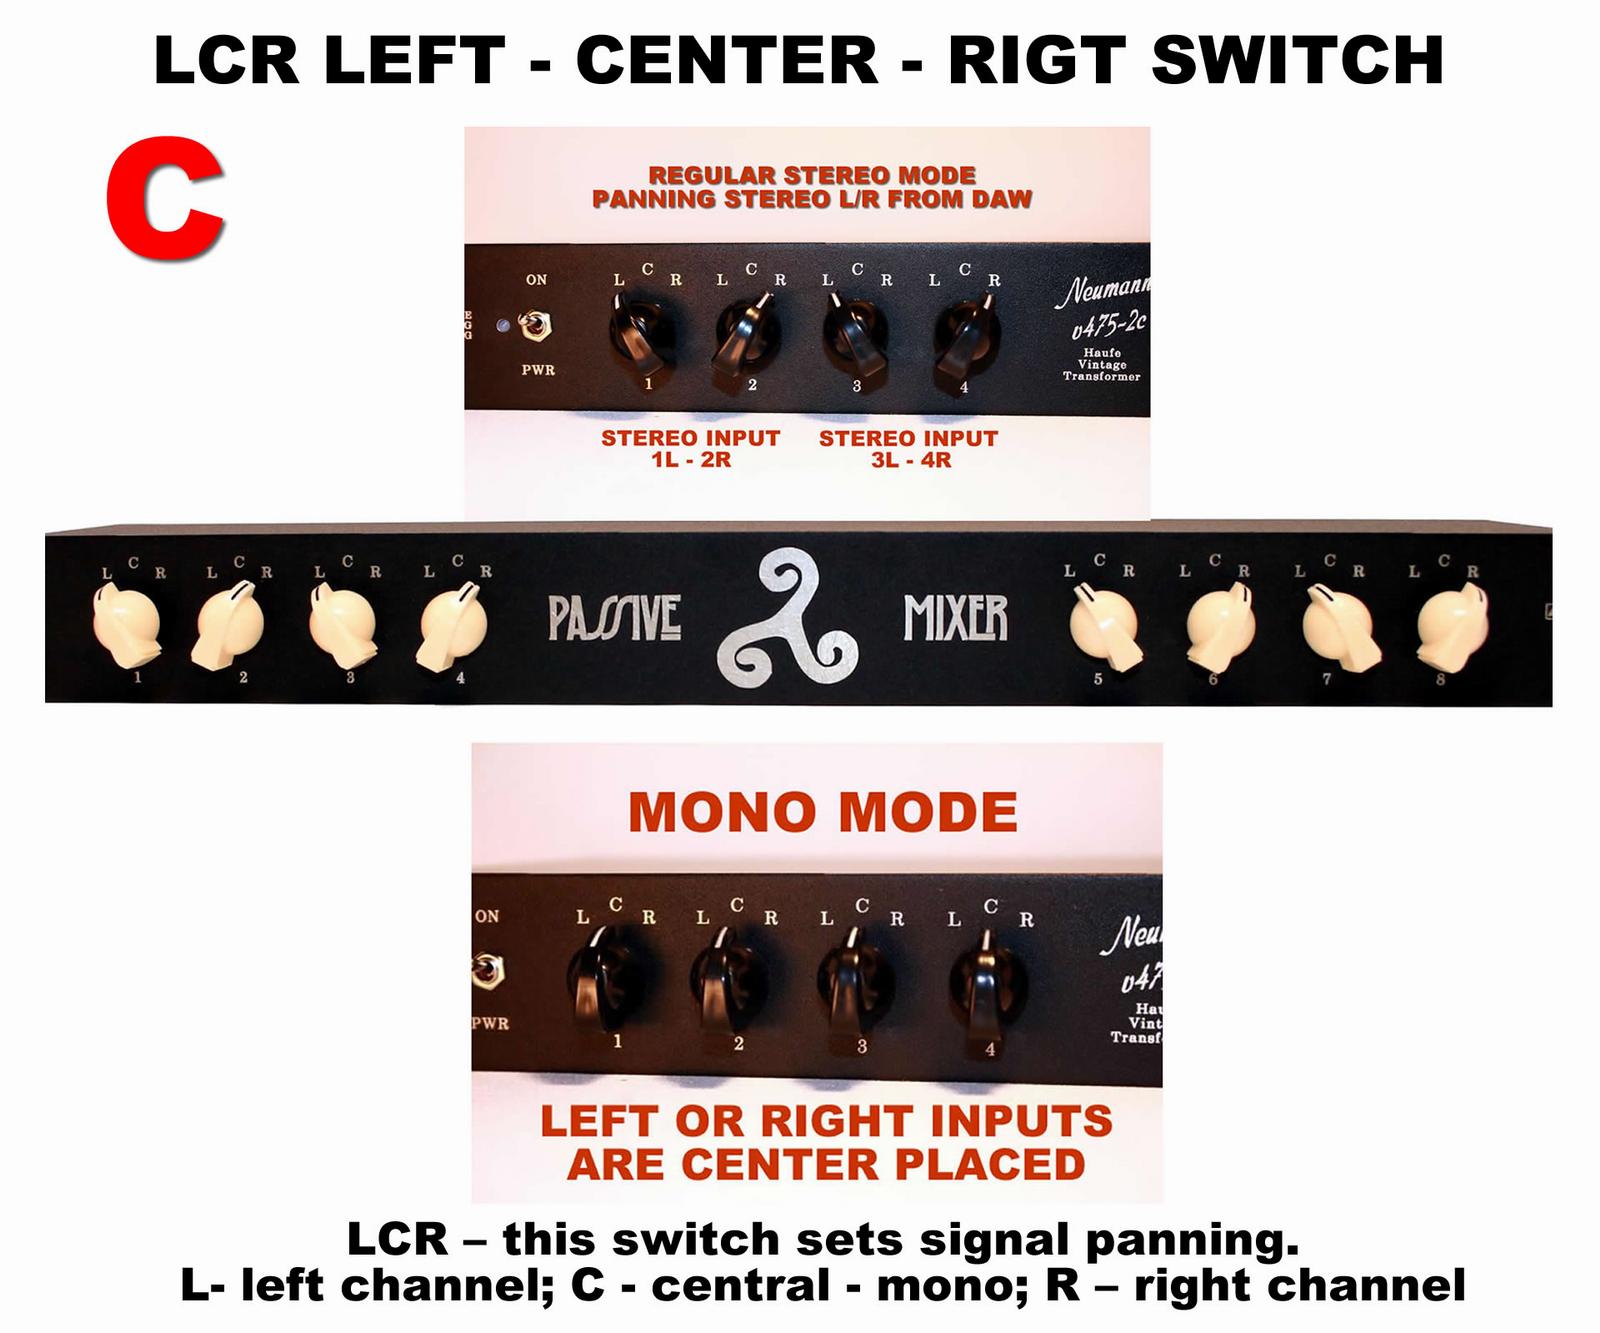
🔴 3-Position (LCR)
Type: One switch per mono channel
Use for: Individual mono sources
Result: Places the channel Left, Center, or Right in the stereo field.
Switch: LEFT = Hard-Left • CENTER = Center • RIGHT = Hard-Right
Positions a mono signal to one of 3 fixed points in the stereo field.
| Version | Switch Type | Best Use Case | Icon |
|---|---|---|---|
| A — STM | One switch per stereo pair | Two mono sources patched as a stereo pair — both centered with a single switch. | 🔵 |
| B — Per-Channel | One switch per channel | Center one channel while keeping all other channels in their original position. | 🟢 |
| C — LCR | 3-position: L / C / R | Positions a mono channel to one of 3 fixed points: Hard-Left, Center, or Hard-Right. | 🔴 |

Toggle Switch Positions
| Switch Position | Down (Stereo default) | Up (Mono ON) |
|---|---|---|
| Input Behavior | L + R operate as a true stereo pair | L and R routed to center (Kick/Bass) |
| Best For | Synths, pads, drum machines, Stereo sources | Kick, bass, snare, lead vocal, mono sources |
| Panning | Full DAW pan control | Fixed center — no DAW adjustment needed |
| Phase Integrity | Fully preserved — channels remain independent | Perfect phase and level symmetry — hardware summed |

Stereo Mode — Switch Down (Default)
Use this for any signal that already has Left and Right components: stereo synths, reverb returns, or any stereo source. Panning is controlled from your DAW as usual — the hardware passes the signal through unchanged.
Mono Mode — Switch Up
Use this when you want to place a mono source perfectly centered in the mix — in hardware, not in the DAW.

How the Mono Switch Saves Interface Outputs
In a hardware setup, your interface outputs are a limited resource. Unlike in a DAW – where channel count is virtually unlimited – a hardware summing mixer is constrained by the number of physical outputs your interface provides.
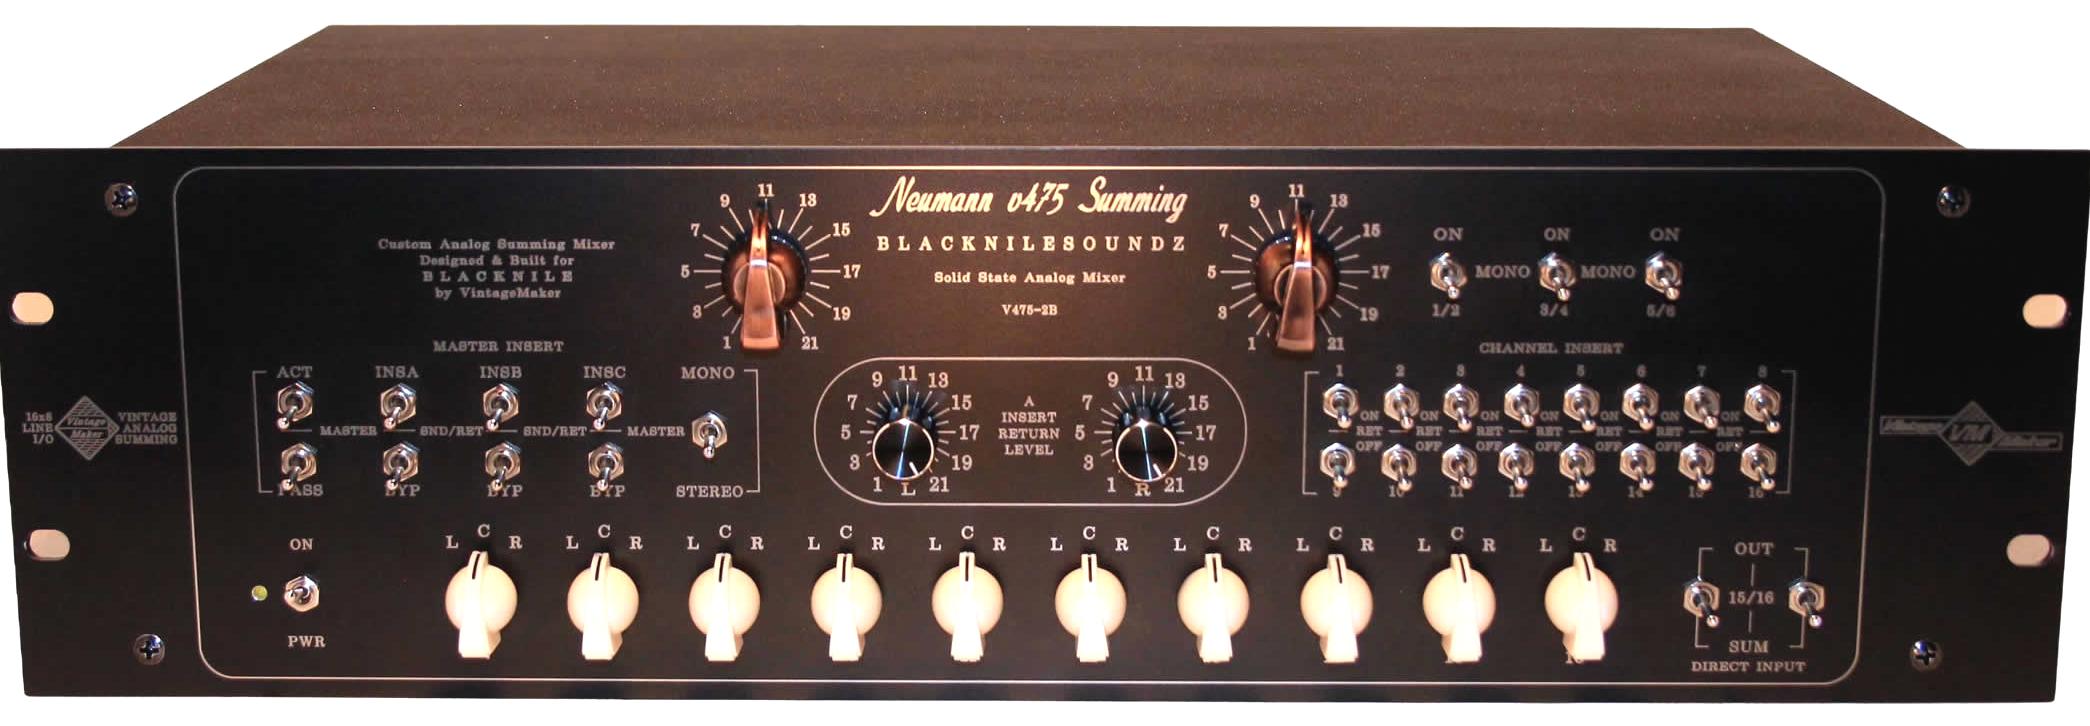
Routing Example with Mono Switch:
- Kick → DAW Left output → Summing Left input
- Bass → DAW Right output → Summing Right input
- Mono Switch ON → both signals routed to center
Result: Two mono sources use only two outputs, both perfectly centered. The two saved outputs are now free for another stereo source — such as a drum bus, vocal bus, or FX return.
Stereo vs. Mono Switch – How It Works
Stereo vs. Mono Switch – Quick Comparison
| Feature / Mode | Stereo Mode – Switch Down (Default) | Mono Mode – Switch Up (Mono ON) |
|---|---|---|
| Input Type | Regular stereo L/R signal | Two mono instruments (L + R) |
| Routing | DAW L/R OUT → Summing Mixer L/R IN | DAW Left → Summing Left, DAW Right → Summing Right |
| Result | True stereo image – PAN from DAW | True analog mono, both signals centered – No PAN from the DAW |
| Best For | Stereo synths, piano, master bus | Kick, bass, snare, lead vocal, mono sources |
| DAW Panning | Full control retained | Centered automatically, no DAW pan adjustments needed |
| Output Efficiency | Uses 2 outputs per source | Saves outputs — 1 output per mono instrument |
When a mono source is panned to center in a DAW, its signal is sent equally to both left and right channels — effectively doubling the sound energy. Pan law compensates for this, but the compensation varies by DAW and settings. A hardware mono switch bypasses this entirely: the signal is summed physically, with perfect amplitude symmetry and no DAW-to-DAW variation. Further reading on pan law: Panning Law — Wikipedia →


When to Use Stereo Mode and When to Switch to Mono
Use Stereo Mode for:
- Stereo synthesizers and keyboards
- Drum machine stereo outputs
- Reverb and delay returns
- Full mix stems — drum bus, music bus, vocal bus
- Any source where left and right contain different information
- Full Pan control from the DAW
Use Mono Mode for:
- Kick drum
- Bass guitar or synth bass
- Lead vocal — when a tight center image is needed
- Snare drum
- Any mono source that needs to be locked to the center of the mix
- No Pan control from the DAW
Pro Tip: Combining both modes in a single session — some inputs stereo, some mono — gives you the same routing flexibility as a large-format analog console, in a compact desktop format.

How Mono Summing Improves Depth and Stereo Imaging
Placing mono sources correctly in the analog domain — locked to center with hardware symmetry rather than DAW pan law approximation — has a direct effect on how the rest of the mix sits around them. A properly centered kick and bass create a stable anchor for the stereo field, which in turn gives more perceived space to instruments panned left and right.
The result is improved stereo imaging across the full mix: the center feels solid and focused, the sides feel wider, and individual instruments are easier to distinguish. This is one of the fundamental principles of professional console mixing — and the mono switch brings it into a compact analog summing setup.
For a full guide on panning technique and getting the most from your analog summing setup, see: The Human Factor in Analog Summing →

FAQ — Mono Channel Conversion Switch
Can I use the mono switch with any audio interface?
Yes. The mono switch works at the hardware level inside the summing mixer — it is independent of your interface. As long as your interface has balanced line outputs and you route channels correctly (kick to Left, bass to Right), the switch handles the rest.
Does switching to mono affect the stereo inputs on other channels?
No. Each switch operates independently per channel or per stereo pair, depending on the version. Activating mono on one input has no effect on adjacent stereo channels.
What’s the difference between summing to mono in the DAW vs. using a hardware switch?
A DAW mono sum uses software algorithms and is subject to the DAW’s pan law implementation. A hardware mono switch physically combines the signals through a resistor network with perfect amplitude and phase symmetry — the result is a cleaner, more stable center image with no DAW-to-DAW variation.
Which switch version should I choose?
If you primarily route kick and bass as a pair: Version A (STM).
If you need per-channel flexibility across different sessions: Version B.
If you want quick left/center/right routing for individual mono sources: Version C.
All three are available as options on VintageMaker summing units.
Why LCR Switching Instead of Analog Pan Pots?
LCR (Left–Center–Right) switching is designed to keep the audio path as clean and transparent as possible.
Traditional analog pan pots work by dividing the signal between the left and right channels. While this is flexible, it can introduce small channel mismatches, increased crosstalk, and a less focused stereo image – especially when signals are placed between the center and the far left or right positions.
With LCR switching, signals are routed directly to the Left, Center, or Right position without passing through an analog pan control. This results in:
- Cleaner and more transparent sound
- Better channel separation
- Improved stereo imaging
- Greater punch and clarity
- More precise instrument placement
This is one of the reasons why LCR mixing remains popular in professional studios. Instruments often sound more focused and defined when placed in fixed Left, Center, or Right positions.
Best Use Cases
- Center: Kick, bass, lead vocals, and other mono sources
- Left / Right: Guitars, percussion, backing vocals, and other mono elements
- Stereo sources: Use two channels hard-panned left and right, while controlling the stereo width at the source
Built for Long-Term Reliability
LCR switches are also significantly more reliable than traditional potentiometers. Mechanical switches can operate flawlessly for many years without maintenance, while potentiometers typically require cleaning, servicing, or replacement over time.
The result is a simpler, cleaner, and more durable solution for high-quality audio mixing.
Ready to configure your summing mixer with mono switching?
Browse Analog Summing Mixers →
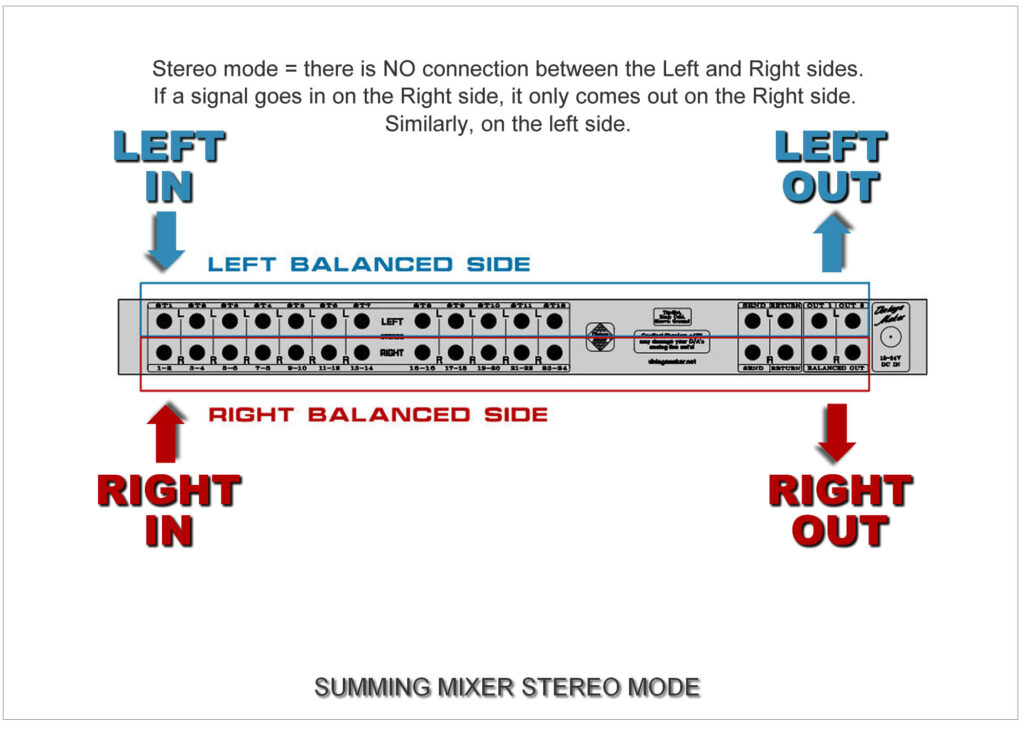
By following these principles, the analog summing mixer enhances spatial depth, stereo imaging, and dynamic range, giving your mix a warm, natural, and professional analog character.